公告:
最近有些帖子的评论,我没去回复。对此,我感到非常抱歉。
最近课业很多,加上开电脑都是先上Facebook和打理网店,已经没有足够的时间让我去写教程。
在未来,我有时间的话,我会再写多些教程。

Sunday, May 2, 2010

Sparkling cursor (鼠标特效)

上次,我教了cursor教程
这次我就教鼠标特效

鼠标特效:


这是我部落格的
↓↓↓          ↓↓↓          ↓↓↓


Demo


将以上的code放入你的部落格


把颜色值换掉
Example :白色背景的话就换去(#000000『黑色』)
Example 2 : 黑色背景的话就换去(#FFFFFF『白色』)

下面是颜色值的参考网页
去找你适合的颜色值吧!
http://www.computerhope.com/htmcolor.htm

=end=
Easy???
^^

Saturday, May 1, 2010

※素材※

分享素材。。。


将以上的code放入你的部落格
这样的话,就可以击退抄袭者~


=end=
Easy???
^^

Sunday, April 18, 2010

blockquote教程

Questions:
×什么是blockquote?
文字换段并左右缩排

以下就是blockquote
想要一个与众不同的blockquote?


首先,找一下的code


把以下的code放在下面
 -moz-border-radius-bottomleft: 15px;
-moz-border-radius-bottomright: 15px;
-moz-border-radius-topleft: 15px;
-moz-border-radius-topright: 15px;

color:#666666;
border: 3px dotted rgb(34, 34, 34);
background: #ffffff url(http://url.png);
background-position:top left;
background-repeat:repeat;
margin: 4px 4px 4px 4px;
padding: 6px 6px 6px 6px;
font-size: 14px;
line-height:1.4em;
}

将http://url.png
改成你要的图片

http://www.imageshack.us
http://photobucket.com/
http://tinypic.com/ 

在这些网址upload你的图片,
再把图片的direct link paste 进去

如果你的html code没有.post blockquote {
那就放在
/* Posts
-----------------------------------------------
 */

记得一定要加.post blockquote {
exp:
.post blockquote {
-moz-border-radius-bottomleft: 15px;
-moz-border-radius-bottomright: 15px;
-moz-border-radius-topleft: 15px;
-moz-border-radius-topright: 15px;
color:#666666;
border: 3px dotted rgb(34, 34, 34);
background: #ffffff url(http://img686.imageshack.us/img686/2554/th5z3324sgj.gif);
background-position:top left;
background-repeat:repeat;
margin: 4px 4px 4px 4px;
padding: 6px 6px 6px 6px;
font-size: 14px;
line-height:1.4em;
}


-moz-border-radius-bottomleft: 15px;
-moz-border-radius-bottomright: 15px;
-moz-border-radius-topleft: 15px;
-moz-border-radius-topright: 15px;

注意上面这个,知道是什么吗?
就是弧度


-moz-border-radius-bottomleft: 15px; (下左)
-moz-border-radius-bottomright: 15px;(下右)
-moz-border-radius-topleft: 15px;(上左)
-moz-border-radius-topright: 15px;(上右)

如果你想要调整着弧度
把15px调整
改得越大,弧度越大,长

border: 3px dotted rgb(34, 34, 34);

http://www.quackit.com/html/codes/html_borders.cfm

可以参考以上的网址,
如果你不想要dotted的border
把dotted改成
exp:
o- dashed
o- solid
o- grooved
o- outset
o- inset
o- mixed
o- double
o- ridged

最后,border的px
也可以改
调得越大,border就越粗
如果不想看到border,只是想看到弧度
那么就把 px 改成 0px

=end=
Easy???
^^

cur,ani,gif教程

Questions:
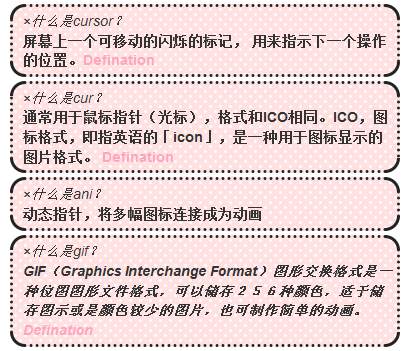
×什么是cursor?
屏幕上一个可移动的闪烁的标记, 用来指示下一个操作的位置。Defination
×什么是cur?
通常用于鼠标指针(光标),格式和ICO相同。ICO,图标格式,即指英语的「icon」,是一种用于图标显示的图片格式。 Defination
×什么是ani?
动态指针,将多幅图标连接成为动画
×什么是gif?
GIF(Graphics Interchange Format)图形交换格式是一种位图图形文件格式,可以储存256种颜色,适于储存图示或是颜色较少的图片,也可制作简单的动画。Defination

怎样将cur,ani,gif放入你的网页
cur 置入方法:
先到一下这几个网址
选cur file
http://www.totallyfreecursors.com/
http://cursors.funutilities.com/
http://www.moocursors.com/
**注意**
cur file 不是animated 的
如果你使用的浏览器(browser)是Internet Explorer,
那才选 animated,
animated cursor=.ani
.ani file 只能在 Internet Explorer呈现

选了后,找它cursor的原本网址
(点击放大)
highlight的地方是cur的原本网址


把以下的codes放入你的html code与之间


把http://url.cur/改成你要的cur地址

注意以下的code
A:hover
body

有没有发觉不一样?

Body就是你的cursor
A:hover就是当你的cursor移到link的时候,就会呈现与body code不一样的cursor

如果你的body和A:hover 的url
放不一样的,
当然呈现出来的效果显然不一样

ani置入方法:
如同cur的置入方法,
只是这只能呈现在
Internet Explorer。

gif置入方法:
如同cur的置入方法,
虽然gif能呈现在任何的browser
可是当gif放入你的网页是,
有部分浏览器无法将gif完完全全呈现,
变成gif在部分浏览器将gif变成png,jpg类似格式,
并没有animate。

=end=
Easy???
^^

Saturday, February 13, 2010

Recent Comment 教程

要怎样在部落格加入Recent Comment这项widget
有两个方法
Method 1:

首先,
按Add a Gadget,
然后按HTML/JavaScript,
把以下这段放入

<script style="text/javascript">

function showrecentcomments(json) {

var numcomments = 5;
var showcommentdate = true;
var showposttitle = true;
var numchars = 50;

for (var i = 0; i < numcomments; i++) {

var entry = json.feed.entry[i];

var alturl;

if (i == json.feed.entry.length) break;

for (var k = 0; k < entry.link.length; k++) {

if (entry.link[k].rel == 'alternate') {

alturl = entry.link[k].href;

break;

}

}

alturl = alturl.replace("#", "#comment-");

var postlink = alturl.split("#");

postlink = postlink[0];

var linktext = postlink.split("/");

linktext = linktext[5];

linktext = linktext.split(".html");

linktext = linktext[0];

var posttitle = linktext.replace(/-/g," ");

posttitle = posttitle.link(postlink);

var commentdate = entry.published.$t;

var cdyear = commentdate.substring(0,4);

var cdmonth = commentdate.substring(5,7);

var cdday = commentdate.substring(8,10);

var monthnames = new Array();

monthnames[1] = "Jan";
monthnames[2] = "Feb";
monthnames[3] = "Mar";
monthnames[4] = "Apr";
monthnames[5] = "May";
monthnames[6] = "Jun";
monthnames[7] = "Jul";
monthnames[8] = "Aug";
monthnames[9] = "Sep";
monthnames[10] = "Oct";
monthnames[11] = "Nov";
monthnames[12] = "Dec";

if ("content" in entry) {

var comment = entry.content.$t;}

else

if ("summary" in entry) {

var comment = entry.summary.$t;}

else var comment = "";

var re = /<\S[^>]*>/g;

comment = comment.replace(re, "");

document.write('<br/>');

if (showcommentdate == true) document.write('On ' + monthnames[parseInt(cdmonth,10)] + ' ' + cdday + ' ');

document.write('<a href="' + alturl + '">' + entry.author[0].name.$t + '</a> commented');

if (showposttitle == true) document.write(' on ' + posttitle);

document.write('<br/>');

if (comment.length < numchars) {

document.write('<i>');

document.write(comment);

document.write('</i>');}

else

{

document.write('<i>');

comment = comment.substring(0, numchars);

var quoteEnd = comment.lastIndexOf(" ");

comment = comment.substring(0, quoteEnd);

document.write(comment + '...<a href="' + alturl + '">(more)</a>');

document.write('</i>');}

document.write('<br/>');

}

document.write('<br/>');

}

</script>

<script src="http://url.blogspot.com/feeds/comments/default?alt=json-in-script&callback=showrecentcomments"></script>

红色的字可以改的
  var numcomments = 5;
var numcomments 的意思是显示的评论数量

  var numchars = 50;
var numchars 的意思是在评论里显示的字数量


monthnames[1] = "Jan";
monthnames[2] = "Feb";
monthnames[3] = "Mar";
monthnames[4] = "Apr";
monthnames[5] = "May";
monthnames[6] = "Jun";
monthnames[7] = "Jul";
monthnames[8] = "Aug";
monthnames[9] = "Sep";
monthnames[10] = "Oct";
monthnames[11] = "Nov";
monthnames[12] = "Dec";

你也可以把上面的monthnames改掉,
Exp:Jan - 一月

最后一定要记得,把
http://url.blogspot.com/

改成你自己的部落格
如果不改,那出现的只是url.blogspot.com 的recent comment


Method 2:
按Add a Gadget,
按Feed(供稿)
http://url.blogspot.com/feeds/comments/full
把以上放入Feed URL(供稿地址)
记得,把http://url.blogspot.com/ 改成你部落格的地址

下面有两张载图
中文(供稿)


English(Feed)


过后按Continue,
下面的载图
它有5 items
意思就是显示出来的recent comments
最多只能显示5个
item dates - 评论发表的日期
item sources/authors - 发表评论的作者
open links in new window - 打开链接时,开一个新的窗口


最后,按done(完成)

=end=
Easy???
^^

Saturday, February 6, 2010

Marquee 教程

Q:What is Marquee?
 A:跑马灯

从右到左


从左到右


左右交替

从下到上


从上到下


上下交替


TEXT


TEXT


参数 用法
behavior=scroll, slide, alternate 跑马方式:循环绕行,跑一次就停,交替
direction=left,right 跑马方向:从左到右,从右到左
loop=100 跑马次数:循环100次,如不写默认为一直循环
width=100%,height=200 跑马范围:宽为100%,高为200像素
scrollamount=20 跑马速度:数目越大越快
bgcolor=#00FFCC 跑马区域:背景颜色

=end=
Easy???
^^

Monday, February 1, 2010

favicon教程

未进入教程前,先明白什么是favicon
favicon:


明白了?

你可以到几个网站
这里有些link
- Favicon Generator
- Favicon Generator
重点介绍
- Favicon ico Generator

进了首页后
找import image


然后import image


建议使用keep dimension,import后,按upload


upload后,你会看到这个


按download favicon,下载后,把它upload到你的sky drive 或者其他 file hosting website

最后,把以下的code拷贝到你的change the html
在的上面

打以下的code


=end=
Easy???
^^